Project Tracker Spread: Plan Any Project on Two Pages
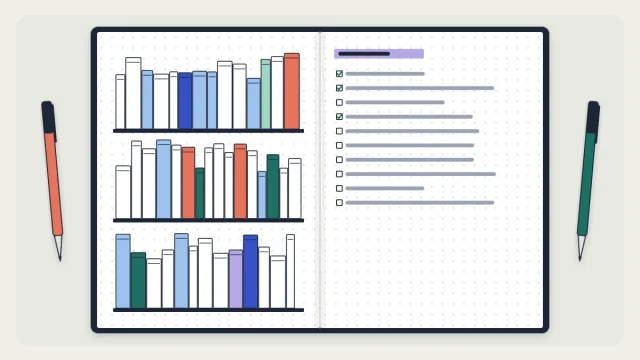
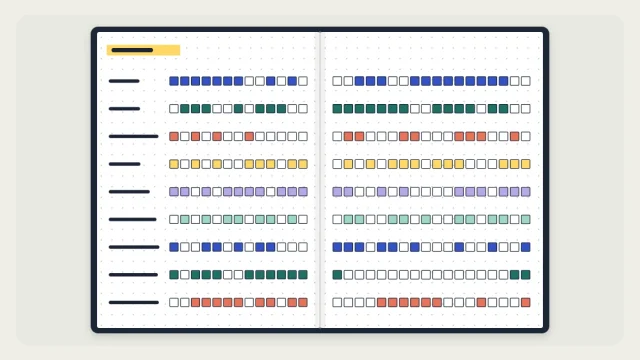
A two-page project layout with a goal box, phase bars on a week timeline, a milestone line and a next-actions checklist, plus a one-page version and a three-column board.

Tutorial at a glance
Materials
- Fine black pen
- Pencil and eraser
- 6-inch (15 cm) ruler
- Two mild-color highlighters
- Small sticky notes (for the board variant)
A project tracker spread puts everything about one project in a single place: what you are trying to finish, the phases it will go through, the dates that matter and the next things to do. Two facing pages are enough for most personal, home, creative or work projects that run from a few weeks to a few months.
The layout below uses the left page for a timeline and the right page for a checklist. A simpler one-page version and a three-column board follow, for projects that do not need a timeline at all.
When a project needs its own spread
A task goes in your daily or weekly log. A project is different: it has several steps, takes more than a week or two, and has parts that depend on each other. Repainting a room, planning a family reunion, preparing a portfolio and moving to a new apartment are all projects.
Give each one its own spread and treat it as a collection. Add it to your index so you can find it again; the guide to bullet journal collections covers how topic pages like this sit beside your dated logs.
Start with a goal box
Across the top of the left page, draw a box the full working width and 4 squares tall. Inside, write three things: the project name, one sentence describing what “finished” looks like, and the target date. For example: “Paint the spare room. Walls and trim painted, furniture back in place. Target: end of next month.”
Draw phases as bars on a week timeline
The timeline shows phases as horizontal bars across columns of weeks. It is a hand-drawn, simplified version of a Gantt chart. The numbers below assume an A5 dot-grid page roughly 26 squares wide and 38 tall; count your own page and adjust.
- Below the goal box, reserve a label column 8 squares wide on the left.
- Divide the remaining width into week columns. With 16 squares left, eight weeks get 2 squares each. For a longer project, use 1 square per week.
- Write the week numbers or the starting date of each week in a header row above the columns.
- List your phases down the label column, one every 3 rows. Four to six phases suit most projects: for the spare room, these might be Plan, Buy supplies, Prep walls, Paint, and Put back.
- For each phase, pencil a bar 1 square tall that starts in the week the phase begins and ends in the week it should be done.
- Check that the bars make sense in order. Phases that depend on an earlier one should start where that one ends.
- Ink the outlines only. Leave the bars empty for now.
As the project moves, color in each bar up to the current week. An outlined bar is planned; a filled one is done. If a phase runs late, extend the outline with a dashed line instead of redrawing it, so the page keeps a record of the original plan.
Tip
Draw the timeline in pencil until the first phase is under way. Early estimates change the most, and pencil bars are easy to shift by a week.
Add a milestone line
Milestones are fixed points: a delivery date, a booking deadline, the day guests arrive. Under the phase bars, rule one horizontal line across the week columns and draw a small circle on it at the week of each milestone. Write a short label under each circle.
Three to five milestones are plenty. When one passes, fill in its circle. Copy the dated ones into your future log or monthly log as well, since those are the pages you check for dates.
Keep a next-actions checklist
The right page holds the task list. Split it into sections that match your phases, with a small heading for each, and write tasks as ordinary bullets with a dot in front. A good next action starts with a verb and is small enough to finish in one go: “Measure walls”, “Choose paint color”, “Borrow a ladder”.
Do not try to list every task at the start. Write the tasks for the first phase in full and a few placeholders for the later ones, then add detail as each phase gets closer. Leave 3 or 4 blank lines at the end of every section for tasks you discover along the way.
The spread is a plan, and the work still happens through your weekly pages. When you set up a week, pick two or three tasks from the checklist and copy them into your weekly spread. Mark them with an X in both places when they are done.
A one-page version
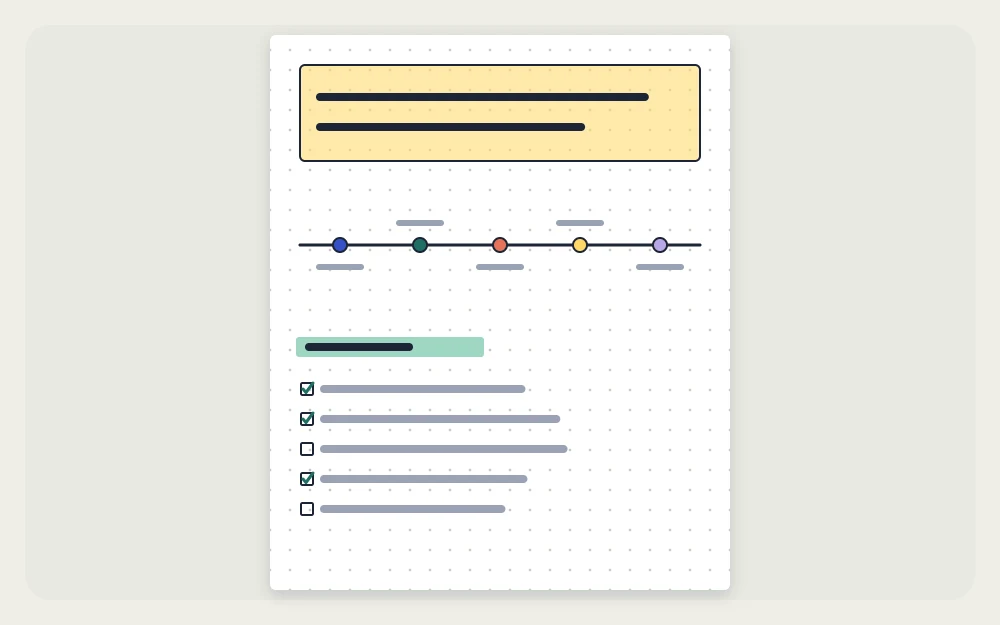
For a small project, all of this fits on a single page without the bars. Put the goal box at the top, then the milestone line by itself with about five circles spaced evenly across the page, and use the rest of the page for the next-actions list.
The three-column board variant
Some projects are a pile of tasks in no fixed order, such as decluttering a house or preparing items for a craft fair. A board suits those better than a timeline. Turn the spread sideways or use both pages, and rule three equal columns headed “To do”, “Doing” and “Done”.
Write each task on a small sticky note and place it in the first column. Move the note across as the task progresses. Small notes of about 1.5 by 2 inches (3.8 by 5 cm) fit two across in a column on an A5 spread.
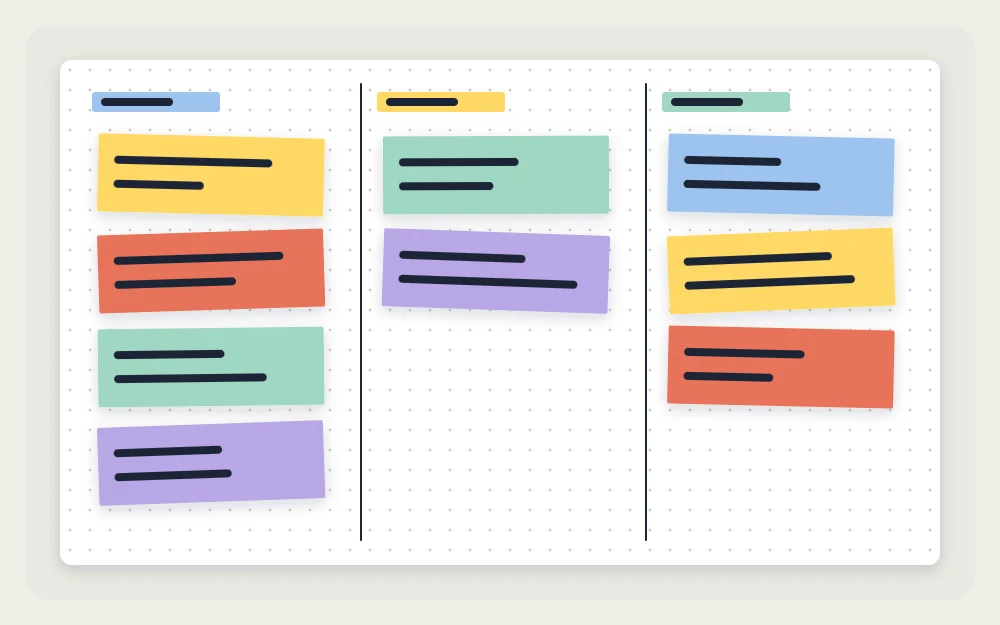
Keep the middle column short, with two or three notes at most, so the board shows clearly what is in progress right now.
Review and close the project
Look at the spread once a week, at the same time you set up your weekly pages. Color the bars, fill any milestone circles, cross off finished tasks and pick the next ones.
When the project ends, write the finish date in the goal box. Any tasks left over get the same treatment as in a regular migration: move them forward, schedule them or strike them through.
Frequently asked questions
What kinds of projects suit a bullet journal project tracker?
Anything with several steps that runs for a few weeks to a few months: repainting a room, planning an event, a move, a craft or writing project, or a piece of work with a deadline. Very large projects with many people involved are usually easier to manage in a shared tool.
How many weeks can a hand-drawn timeline cover on an A5 page?
With an 8-square label column on a page about 26 squares wide, you have roughly 16 squares left. That gives eight weeks at 2 squares each or about sixteen weeks at 1 square each. For anything longer, run the timeline across both pages or use months as columns.
Should I use a timeline or a three-column board?
Use a timeline when the order and timing of phases matter, for example when one step has to finish before the next can start. Use a board when the project is a set of independent tasks in no fixed order and you mainly want to see what is waiting, in progress and finished.