Simple Weekly Spread: A Step-by-Step Layout for Beginners
Draw a two-page weekly layout of eight equal boxes, seven days plus a notes box, on an A5 dot grid. Square counts, pencil guides, inking and headers are covered step by step.

Tutorial at a glance
Materials
- Pencil and eraser
- 6-inch (15 cm) ruler
- 0.3 mm or 0.5 mm black fineliner or gel pen
- Mild-color highlighter (optional)
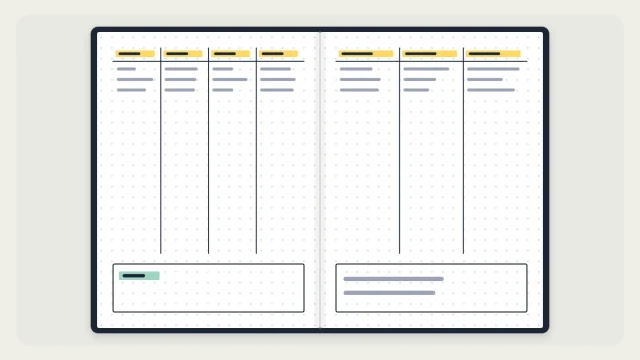
A simple weekly spread does one job: it shows you seven days at once, with enough room in each to write what needs doing. This layout uses eight equal boxes across two facing pages, one for each day and one left over for notes, and you can draw it with a pencil, a ruler and a single pen.
The numbers below are worked out for an A5 dot-grid page that is 26 squares wide and 38 squares tall. Your notebook may differ by a square or two, so count your own page before you draw anything and adjust the box sizes to fit.
What you need
- An A5 dot-grid notebook with a 5 mm grid
- A pencil and a soft eraser
- A 6-inch (15 cm) ruler, ideally a clear one
- A 0.3 mm or 0.5 mm black fineliner or gel pen
- Optional: one mild-color highlighter for the headers
Set aside roughly 20 to 30 minutes the first time. Once you know the numbers for your notebook, the same spread takes about half that.
Count your page first
Count the squares across the top of one page and down one side, then write both numbers in pencil in a corner. Counting squares instead of measuring in inches keeps every box aligned to the dots, which is what makes a hand-drawn layout look tidy. If counting dots is new to you, the guide on using a ruler in a bullet journal explains the method in more detail.
On a 26 x 38 page, the plan is:
- A margin of 1 square on the left and on the right, leaving 24 squares of width
- 3 squares at the top for the week title
- 1 square of margin at the bottom, leaving 34 squares of height
- Four boxes per page, each 12 squares wide and 17 squares tall
If your page is 27 squares wide, add the spare square to one of the side margins. If it is 39 tall, give the extra row to the title area. An odd square should always go to a margin, never to one box, so the boxes stay equal.
Draw the pencil guides
Work on the left page first and press lightly, because these lines will be inked over or erased.
- Mark the top-left corner of the frame: 1 square in from the left edge and 3 squares down from the top.
- From that corner, draw a line 24 squares to the right, then 34 squares down each side, and close the rectangle along the bottom.
- Count 12 squares along the top edge and draw a vertical line down the middle of the frame.
- Count 17 squares down the left edge and draw a horizontal line across the middle.
- Repeat the same four steps on the right page, starting from the same row of dots so the two pages line up across the fold.

Before moving on, check that all eight boxes have the same count in both directions.
Add the header bars
Each box gets a header bar for the day name and date. Count 2 squares down from the top edge of every box and draw a light pencil line across its full width. That leaves 15 rows of writing space underneath, enough for 15 short entries if you write one per row.
Write the headers in pencil first. A common order runs Monday and Tuesday across the top of the left page, Wednesday and Thursday below them, then Friday and Saturday across the top of the right page, with Sunday and the notes box at the bottom. If your week starts on Sunday, shift everything by one box; the notes box stays in the bottom-right corner either way.
Tip
Write the day name on the left of each header bar and the date number small on the right. Keeping the two apart stops a long day name such as Wednesday from crowding the bar.
Ink the lines
Ink the long lines first: the outer frame, then the two dividing lines, then the header lines. Pull the pen along the ruler in one steady motion instead of several short strokes, and lift the ruler straight up when you finish so it does not slide through wet ink.
Give the ink about a minute to dry before you erase the pencil. Gel ink usually takes longer than fineliner ink, and erasing too early drags gray streaks across the page.
Watch out
Wipe the ruler edge with a tissue every few lines. Wet ink collects along the edge and transfers to the next line you draw.
Then ink the day names and dates. If you want the bars to stand out, run a highlighter through each one or borrow a style from the guide to easy header styles.
Fill in your week
Start with what is already fixed. Check your monthly log for appointments and deadlines that fall in this week and copy them into the right day boxes. Then add tasks, one per line, using the same symbols as the rest of your notebook: a dot for a task, an open circle for an event and a dash for a note. The full set is covered in the guide to the bullet journal key.

The notes box is for anything without a day attached: a shopping list, tasks that can happen any time this week, or things to carry into next week.
Adjust the layout next week
After a week of use, the spread will show you what to change. Three adjustments cover most cases:
- Weekend boxes stay half empty. Split one box between Saturday and Sunday and use the freed box for a second notes area or a task list.
- Weekday boxes overflow. Narrow the header bar to 1 square, or write smaller with a 0.3 mm pen.
- The title area feels wasted. Shrink it to 1 square and add a row to each box, making them 18 squares tall.
Once eight boxes feel routine, the roundup of weekly spread layouts describes other structures, such as vertical columns and sidebars, that you can draw with the same counting method.
Frequently asked questions
How many squares should each box be in a weekly spread?
On an A5 dot-grid page that is 26 squares wide and 38 tall, four boxes of 12 by 17 squares fit on each page with a small margin and a title area. Count your own page first, because notebooks vary, and put any odd square into a margin.
Do I have to draw a new weekly spread every week?
Yes, each week gets its own spread, but it becomes quick once you know the square counts for your notebook. Write those counts on a back page so you can redraw the frame without recounting. You can also pencil two or three weeks ahead in one sitting.
What goes in the eighth box of the spread?
The eighth box is for anything that does not belong to one day: tasks that can happen at any point in the week, a shopping list, reminders for next week or loose notes. If you rarely use it, turn it into a second weekend box or a small tracker.