Minimalist Weekly Spread: Clean Layouts With Less Drawing
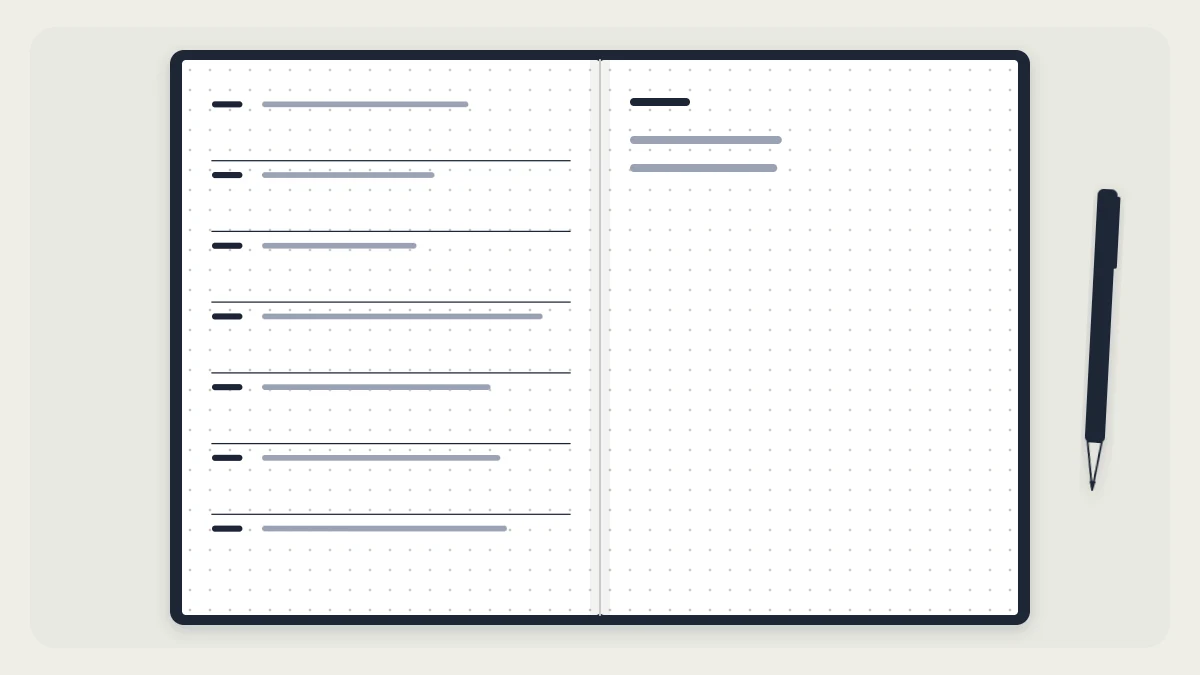
Three pared-back weekly layouts you can set up in a few minutes with one pen: seven rows on a page, margin day markers with a running list, and a two-column split.
Tutorial at a glance
Materials
- Fine black pen (0.3 mm or 0.5 mm)
- Pencil and eraser
- 6-inch (15 cm) ruler
A minimalist weekly spread strips the week down to what you actually read: the days and what happens on them. There are no boxes to close, no banners to letter and no second pen color. The layout is held together by spacing instead of ink, which makes it quick to draw and easy to redo when plans change.
The three variants below each take roughly 5 to 10 minutes to set up. Square counts assume a 5 mm A5 dot grid of about 26 squares across and 38 down; count your own page, since notebooks differ by a square or two.
What makes a spread minimalist
Three choices do most of the work:
- Fewer lines. A day needs one line above it, not four around it. Open-sided areas look lighter and take a quarter of the ruling.
- One pen. A single black 0.3 mm or 0.5 mm fineliner or gel pen draws the lines and writes the entries.
- Whitespace as structure. A blank row between two days separates them as clearly as a drawn line does, and the dot grid already keeps your writing level.

What you keep is the logging system itself. Dots for tasks, open circles for events and dashes for notes carry more of the meaning on a bare page, so use them consistently. The bullet journal key lists the full set.
Materials
- A5 dot-grid notebook
- One fine black pen
- Pencil and eraser
- 6-inch (15 cm) ruler
Variant 1: seven rows on one page
The whole week sits on the left page and the right page stays free for notes.
- Leave the top 3 squares of the left page for the week’s dates, written small in the top-left corner.
- Starting 3 squares down, draw a horizontal line across the page every 5 squares. Seven lines give seven rows of 5 squares, which uses the remaining 35 rows.
- Stop each line 1 square short of both page edges so the rows have a margin.
- Write the day’s initial and date number at the left end of each row, directly under its line.
Each row holds four entries, with one blank row left before the next line. If that is too few, start a second set of entries halfway across the page, at about 12 squares in. The right page takes everything else: a loose task list, notes from calls, a short list for the weekend.
Variant 2: margin day markers with a running list
This version has no ruled lines at all. The week is one continuous list, and small markers in the margin show where each day starts.
- Reserve the first 3 squares on the left of the page as a margin. You can mark its edge with a faint pencil line and erase it later, or simply start every entry on the fourth dot.
- On Monday, write the day’s initial and date in the margin and begin your entries beside it, one per row.
- When Monday is finished, skip one row. Write Tuesday’s marker in the margin on the next row and continue.
- Carry on down the page, and onto the facing page if the week needs it.

Because no space is assigned in advance, a day with twelve entries and a day with one both fit. The trade-off is that you cannot write ahead: Thursday has no place on the page until Wednesday is finished. Keep future appointments in your monthly log and copy them over as each day arrives.
Tip
Underline each margin marker with a single short stroke. It is the only decoration this layout needs, and it makes a day easy to find when you flip back.
Variant 3: two-column split
One vertical line divides the page, and nothing else is ruled.
- Count the squares across your page and find the middle. On a 26-square page, that is 13 squares in.
- Draw one vertical line from 2 squares below the top edge to 1 square above the bottom, a length of 35 squares.
- Use the left column for the days. Write each day’s marker and its fixed events, then leave a blank row before the next day. Five squares of height per day, four for entries and one blank, fills the column exactly.
- Use the right column as the week’s task list, with no days attached.
The split answers a common problem with day boxes: tasks that get rewritten from one day to the next. Here a task is written once in the right column and marked with an X when done. At the end of the week, anything still open is a candidate for migration into the next spread.
What to leave out
A minimalist page works by omission, so it helps to decide in advance what will not be on it:
- Outer frames around the page
- Lettered headers and banners; a small date range in one corner is enough
- Weekly trackers, unless you check them every day
- Color coding, or at most one highlighter used for a single purpose
- Filler doodles in empty areas
Empty space is not a sign that the spread is unfinished. It is room for a week that turns out busier than expected.
Watch out
Do not shrink your handwriting to match the sparse look. Lines that are hard to read defeat the purpose of the page, so keep letters close to one square tall.
When to add structure back
If you find yourself drawing the same extra line every week, make it part of the layout. Minimalist does not mean fixed, and one added line that you use is better than a bare page that you work around.
If you need to plan several days ahead with space reserved for each, a boxed layout such as the simple weekly spread will fit better. The roundup of weekly spread layouts describes other structures to try, including a sidebar version and a timeline strip.
Frequently asked questions
What pen is best for a minimalist weekly spread?
One fine black pen is enough. A 0.3 mm fineliner gives thin, even lines for ruling and small writing, while a 0.5 mm gel pen is bolder and easier to read. Choose whichever suits your handwriting size and use it for both the lines and the entries.
How do I stop a minimalist spread from looking empty?
Treat the blank space as part of the layout instead of something to fill. Keep margins and gaps consistent, align every entry to the same column of dots, and use one small repeated detail, such as an underlined day marker. Consistency is what makes a sparse page look deliberate.
Can I use a minimalist weekly spread in a lined notebook?
Yes. The running list with margin day markers needs no grid at all, and the seven-row version only asks you to count lines instead of squares. The two-column split works too, as long as you measure the middle of the page with a ruler before drawing the dividing line.