Travel Planning Spread: Packing Lists and Itinerary Pages
Plan a whole trip on four notebook pages: a packing checklist by category, day-by-day itinerary boxes, a bookings table and a simple budget, plus a master packing list you can reuse for every trip.
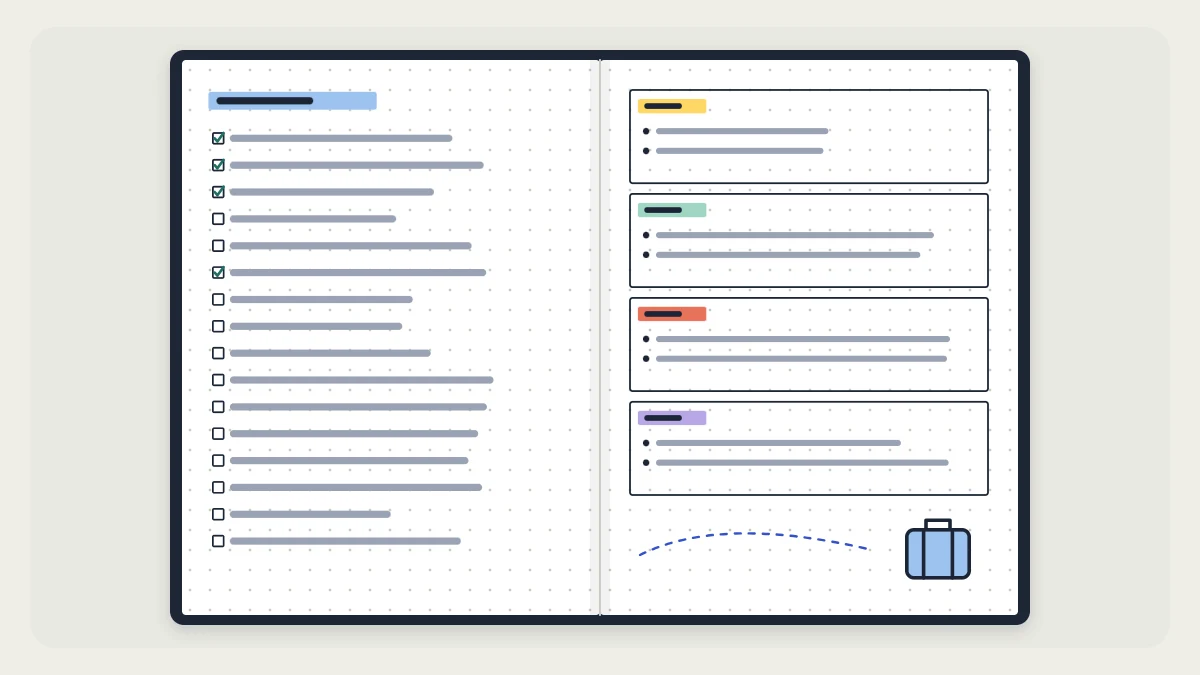
Tutorial at a glance
Materials
- Pencil and eraser
- 0.3 mm fineliner
- 6-inch (15 cm) ruler
- One mild-color highlighter for header bars
A travel planning spread keeps a whole trip in one place in your notebook: what to pack, where you will be each day, the bookings you need to find quickly and what you plan to spend. Instead of searching through emails at the airport, you open one spread.
The layout below uses two spreads, four pages in total: a packing checklist by category, day-by-day itinerary boxes, a bookings and reference table and a simple budget table. A short weekend away may need only the first two.
Set up the trip as a collection
A trip is a topic, not a date, so it belongs with your bullet journal collections. Start it on the next blank spread, write the destination and dates as the title, and add it to your index straight away so the pages are easy to find later.
If the trip is months away, note the dates in your future log too, with the page number of the trip spread beside them. The future log holds the date; the collection holds the details.
Page 1: packing checklist by category
One long packing list is hard to scan. Four category boxes are faster, because you pack one kind of thing at a time.
- Count the squares on your page. On a page about 26 squares wide and 38 tall, leave 3 squares at the top for a title.
- Divide the remaining space into four equal boxes, two across and two down, with a 1-square gap between them. On the example page, each box is roughly 12 squares wide and 17 tall.
- Add a header bar 2 squares tall at the top of each box.
- Label the boxes. A set that suits most trips: clothes, toiletries, documents and money, electronics and extras.
- Inside each box, write one item per line with a small checkbox in front.
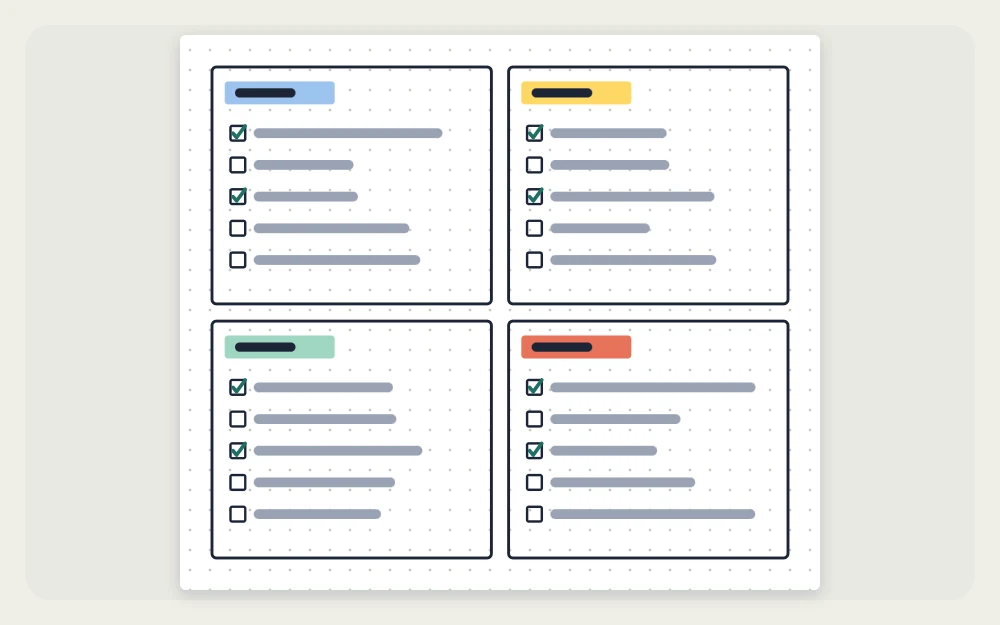
Use each checkbox twice. Draw a single diagonal line when the item goes into the bag on the way out, and complete the X when it goes back in for the trip home. That second pass is what helps you notice a charger left in a wall socket.
Keep a reusable master packing list
Most of what you pack is the same on every trip. Instead of rebuilding the list each time, keep one master packing list as a permanent collection: everything you might ever take, grouped under the same four categories, with no checkboxes.
For each new trip, copy only the lines that apply and add the few items specific to that destination. After the trip, go back to the master list and add anything you wished you had brought. The list gets a little more complete each time, and writing a trip list from it takes about five minutes.
Page 2: day-by-day itinerary boxes
The itinerary page gets one box per day. For a trip of up to six days, divide the page into six equal boxes, two across and three down. For a longer trip, use horizontal rows about 4 squares tall, which fits roughly eight or nine days on an A5 page.
Give each box a small header for the date and the place where you will sleep that night. Inside, use rapid-logging bullets: an open circle (○) for anything with a fixed time, such as a train or a booked tour, and a dot (•) for things you would like to do at no set time. Keeping the two apart shows how much of each day is actually fixed.
A timeline is a good alternative when the trip moves between several places. Draw one vertical line down the left third of the page, add a node for each day and write the entries beside it.
Watch out
Leave part of each day box blank. Opening hours, weather and transport change, and a box filled to the edge leaves no room to write the new plan.
Page 3: bookings and reference table
This table is the page you will reach for at check-in desks and ticket gates. Give each booking one row and use four columns:
| Column | What goes in it | Example |
|---|---|---|
| What | The booking in two or three words | Flight out, hotel, car rental |
| When | Date and time | Departure day, morning |
| Reference | Booking or confirmation code | The code from the confirmation email |
| Paid | A checkbox | X once fully paid |
Below the table, leave a few lines for reference details: the address of your accommodation, a local contact number and the opening hours of anything you do not want to miss.
Do not copy passport numbers, card numbers or passwords into a notebook that travels with you. A confirmation code is enough to find a booking.
Page 4: a simple budget table
The budget needs two number columns: planned and actual. List your spending categories down the left, such as transport, accommodation, food, activities and gifts, and fill in the planned column before you leave.
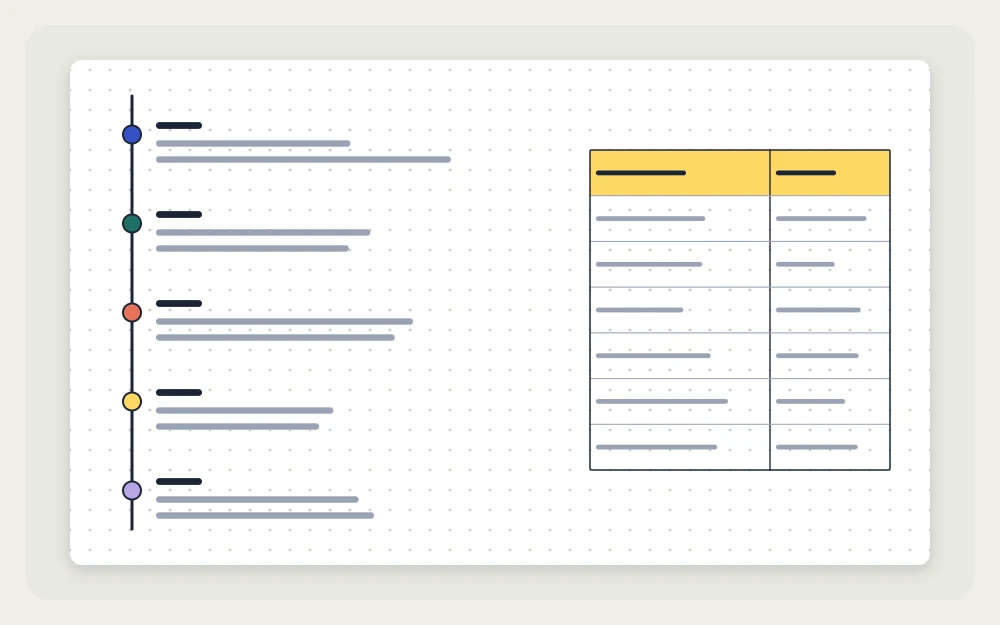
During the trip, jot what you spend in that day’s itinerary box, then add up each category into the actual column every evening or two. A total row at the bottom shows where you stand.
Rule the table narrow: about 10 squares for the category and 6 for each number column is plenty, which leaves the rest of the page free for notes. On a short trip, the budget table can share a page with the timeline itinerary.
After the trip
A finished trip spread is worth keeping. Add two or three lines at the bottom: what you packed and never used, what you were missing and one thing you would plan differently. Those notes feed your master list and make the next spread faster to draw.
If you enjoy decorating, a small suitcase or a paper plane in one corner is enough to set the page apart. The guide to simple bullet journal doodles shows how to build small icons like these from basic shapes.
Frequently asked questions
How far ahead should I set up a travel spread?
Set it up as soon as the dates are fixed, even if the trip is months away. Early setup gives you one place to note bookings as you make them. The packing list and daily details can stay mostly blank until roughly a week or two before departure.
Can I plan more than one trip in the same notebook?
Yes. Give each trip its own spread and its own index line, and keep a single master packing list that all of them draw from. If two trips sit far apart in the notebook, thread the pages by writing each one's page number beside the other.
What if my trip is longer than a week?
Switch the itinerary from boxes to rows. Rows about four squares tall fit roughly eight or nine days on an A5 page, and a two-page spread doubles that. For very long trips, give each week its own page and keep the bookings table as a single shared reference.

